
Nextcloud is an open-source software suite that enables you to set up and manage your own cloud storage and collaboration platform. It offers a range of features similar to popular cloud services like Google Drive or Dropbox but with the added benefit of complete control over your data and the server where it’s hosted.
I wanted to have a look at Nextcloud and the steps to setup a own instance with a PostgreSQL based database together with NGinx as the webserver to serve the WebUI. Before doing a full productive setup I wanted to play around locally with all the needed steps and worked out all the steps within KVM machine.
While doing this I wrote down some notes to mostly document for myself what I need to do to get a Nextcloud installation running and usable. So this manual describes how to setup a Nextcloud installation on Debian 12 Bookworm based on NGinx and PostgreSQL.
Nextcloud Installation
Install PHP and PHP extensions for Nextcloud
Nextcloud is basically a PHP application so we need to install PHP packages to get it working in the end. The following steps are based on the upstream documentation about how to install a own Nextcloud instance.
Installing the virtual package package php on a Debian Bookworm system
would pull in the depending meta package php8.2. This package itself would
then pull also the package libapache2-mod-php8.2 as an dependency which
then would pull in also the apache2 webserver as a depending package. This
is something I don’t wanted to have as I want to use NGinx that is already
installed on the system instead.
To get this we need to explicitly exclude the package libapache2-mod-php8.2
from the list of packages which we want to install, to achieve this we have
to append a hyphen - at the end of the package name, so we need to use
libapache2-mod-php8.2- within the package list that is telling apt to
ignore this package as an dependency. I ended up with this call to get all
needed dependencies installed.
$ sudo apt install php php-cli php-fpm php-json php-common php-zip \
  php-gd php-intl php-curl php-xml php-mbstring php-bcmath php-gmp \
  php-pgsql libapache2-mod-php8.2-
-
Check php version (optional step)
$ php -v
PHP 8.2.28 (cli) (built: Mar 13 2025 18:21:38) (NTS)
Copyright (c) The PHP Group
Zend Engine v4.2.28, Copyright (c) Zend Technologies
    with Zend OPcache v8.2.28, Copyright (c), by Zend Technologies
-
After installing all the packages, edit the
php.inifile:$ sudo vi /etc/php/8.2/fpm/php.ini -
Change the following settings per your requirements:
max_execution_time = 300
memory_limit = 512M
post_max_size = 128M
upload_max_filesize = 128M
-
To make these settings effective, restart the php-fpm service
$ sudo systemctl restart php8.2-fpm
Install PostgreSQL, Create a database and user
This manual assumes we will use a PostgreSQL server on localhost, if you have a server instance on some remote site you can skip the installation step here.
$ sudo apt install postgresql postgresql-contrib postgresql-client
-
Check version after installation (optinal step):
$ sudo -i -u postgres$ psql -version -
This output will be seen:
psql (15.12 (Debian 15.12-0+deb12u2)) -
Exit the PSQL shell by using the command
\q.postgres=# \q -
Exit the CLI of the postgres user:
postgres@host:~$ exit
Create a PostgreSQL Database and User:
-
Create a new PostgreSQL user (Use a strong password!):
$ sudo -u postgres psql -c "CREATE USER nextcloud_user PASSWORD '1234';" -
Create new database and grant access:
$ sudo -u postgres psql -c "CREATE DATABASE nextcloud_db WITH OWNER nextcloud_user ENCODING=UTF8;" -
(Optional) Check if we now can connect to the database server and the database in detail (you will get a question about the password for the database user!). If this is not working it makes no sense to proceed further! We need to fix first the access then!
$ psql -h localhost -U nextcloud_user -d nextcloud_dbor
$ psql -h 127.0.0.1 -U nextcloud_user -d nextcloud_db
- Log out from postgres shell using the command
\q.
Download and install Nextcloud
-
Use the following command to download the latest version of Nextcloud:
$ wget https://download.nextcloud.com/server/releases/latest.zip -
Extract file into the folder
/var/www/htmlwith the following command:$ sudo unzip latest.zip -d /var/www/html -
Change ownership of the
/var/www/html/nextclouddirectory to www-data.$ sudo chown -R www-data:www-data /var/www/html/nextcloud
Configure NGinx for Nextcloud to use a certificate
In case you want to use self signed certificate, e.g. if you play around to setup Nextcloud locally for testing purposes you can do the following steps.
-
Generate the private key and certificate:
$ sudo openssl req -x509 -nodes -days 365 -newkey rsa:2048 -keyout nextcloud.key -out nextcloud.crt$ sudo cp nextcloud.crt /etc/ssl/certs/ && sudo cp nextcloud.key /etc/ssl/private/ -
If you want or need to use the service of Let’s Encrypt (or similar) drop the step above and create your required key data by using this command:
$ sudo certbot --nginx -d nextcloud.your-domain.comYou will need to adjust the path to the key and certificate in the next step!
-
Change the NGinx configuration:
$ sudo vi /etc/nginx/sites-available/nextcloud.conf -
Add the following snippet into the file and save it.
# /etc/nginx/sites-available/nextcloud.conf
upstream php-handler {
    #server 127.0.0.1:9000;
    server unix:/run/php/php8.2-fpm.sock;
}

# Set the `immutable` cache control options only for assets with a cache
# busting `v` argument

map $arg_v $asset_immutable {
    "" "";
    default ", immutable";
}

server {
    listen 80;
    listen [::]:80;
    # Adjust this to the correct server name!
    server_name nextcloud.local;

    # Prevent NGinx HTTP Server Detection
    server_tokens off;

    # Enforce HTTPS
    return 301 https://$server_name$request_uri;
}

server {
    listen 443      ssl http2;
    listen [::]:443 ssl http2;
    # Adjust this to the correct server name!
    server_name nextcloud.local;

    # Path to the root of your installation
    root /var/www/html/nextcloud;

    # Use Mozilla's guidelines for SSL/TLS settings
    # https://mozilla.github.io/server-side-tls/ssl-config-generator/
    # Adjust the usage and paths of the correct key data! E.g. it you want to use Let's Encrypt key material!
    ssl_certificate /etc/ssl/certs/nextcloud.crt;
    ssl_certificate_key /etc/ssl/private/nextcloud.key;
    # ssl_certificate /etc/letsencrypt/live/nextcloud.your-domain.com/fullchain.pem;
    # ssl_certificate_key /etc/letsencrypt/live/nextcloud.your-domain.com/privkey.pem;

    # Prevent NGinx HTTP Server Detection
    server_tokens off;

    # HSTS settings
    # WARNING: Only add the preload option once you read about
    # the consequences in https://hstspreload.org/. This option
    # will add the domain to a hardcoded list that is shipped
    # in all major browsers and getting removed from this list
    # could take several months.
    #add_header Strict-Transport-Security "max-age=15768000; includeSubDomains; preload" always;

    # set max upload size and increase upload timeout:
    client_max_body_size 512M;
    client_body_timeout 300s;
    fastcgi_buffers 64 4K;

    # Enable gzip but do not remove ETag headers
    gzip on;
    gzip_vary on;
    gzip_comp_level 4;
    gzip_min_length 256;
    gzip_proxied expired no-cache no-store private no_last_modified no_etag auth;
    gzip_types application/atom+xml text/javascript application/javascript application/json application/ld+json application/manifest+json application/rss+xml application/vnd.geo+json application/vnd.ms-fontobject application/wasm application/x-font-ttf application/x-web-app-manifest+json application/xhtml+xml application/xml font/opentype image/bmp image/svg+xml image/x-icon text/cache-manifest text/css text/plain text/vcard text/vnd.rim.location.xloc text/vtt text/x-component text/x-cross-domain-policy;

    # Pagespeed is not supported by Nextcloud, so if your server is built
    # with the `ngx_pagespeed` module, uncomment this line to disable it.
    #pagespeed off;

    # The settings allows you to optimize the HTTP2 bandwidth.
    # See https://blog.cloudflare.com/delivering-http-2-upload-speed-improvements/
    # for tuning hints
    client_body_buffer_size 512k;

    # HTTP response headers borrowed from Nextcloud `.htaccess`
    add_header Referrer-Policy                   "no-referrer"       always;
    add_header X-Content-Type-Options            "nosniff"           always;
    add_header X-Frame-Options                   "SAMEORIGIN"        always;
    add_header X-Permitted-Cross-Domain-Policies "none"              always;
    add_header X-Robots-Tag                      "noindex, nofollow" always;
    add_header X-XSS-Protection                  "1; mode=block"     always;

    # Remove X-Powered-By, which is an information leak
    fastcgi_hide_header X-Powered-By;

    # Set .mjs and .wasm MIME types
    # Either include it in the default mime.types list
    # and include that list explicitly or add the file extension
    # only for Nextcloud like below:
    include mime.types;
    types {
        text/javascript js mjs;
        application/wasm wasm;
    }

    # Specify how to handle directories -- specifying `/index.php$request_uri`
    # here as the fallback means that NGinx always exhibits the desired behaviour
    # when a client requests a path that corresponds to a directory that exists
    # on the server. In particular, if that directory contains an index.php file,
    # that file is correctly served; if it doesn't, then the request is passed to
    # the front-end controller. This consistent behaviour means that we don't need
    # to specify custom rules for certain paths (e.g. images and other assets,
    # `/updater`, `/ocs-provider`), and thus
    # `try_files $uri $uri/ /index.php$request_uri`
    # always provides the desired behaviour.
    index index.php index.html /index.php$request_uri;

    # Rule borrowed from `.htaccess` to handle Microsoft DAV clients
    location = / {
        if ( $http_user_agent ~ ^DavClnt ) {
            return 302 /remote.php/webdav/$is_args$args;
        }
    }

    location = /robots.txt {
        allow all;
        log_not_found off;
        access_log off;
    }

    # Make a regex exception for `/.well-known` so that clients can still
    # access it despite the existence of the regex rule
    # `location ~ /(\.|autotest|...)` which would otherwise handle requests
    # for `/.well-known`.
    location ^~ /.well-known {
        # The rules in this block are an adaptation of the rules
        # in `.htaccess` that concern `/.well-known`.

        location = /.well-known/carddav { return 301 /remote.php/dav/; }
        location = /.well-known/caldav  { return 301 /remote.php/dav/; }

        location /.well-known/acme-challenge    { try_files $uri $uri/ =404; }
        location /.well-known/pki-validation    { try_files $uri $uri/ =404; }

        # Let Nextcloud's API for `/.well-known` URIs handle all other
        # requests by passing them to the front-end controller.
        return 301 /index.php$request_uri;
    }

    # Rules borrowed from `.htaccess` to hide certain paths from clients
    location ~ ^/(?:build|tests|config|lib|3rdparty|templates|data)(?:$|/)  { return 404; }
    location ~ ^/(?:\.|autotest|occ|issue|indie|db_|console)                { return 404; }

    # Ensure this block, which passes PHP files to the PHP process, is above the blocks
    # which handle static assets (as seen below). If this block is not declared first,
    # then NGinx will encounter an infinite rewriting loop when it prepend `/index.php`
    # to the URI, resulting in a HTTP 500 error response.
    location ~ \.php(?:$|/) {
        # Required for legacy support
        rewrite ^/(?!index|remote|public|cron|core\/ajax\/update|status|ocs\/v[12]|updater\/.+|ocs-provider\/.+|.+\/richdocumentscode(_arm64)?\/proxy) /index.php$request_uri;

        fastcgi_split_path_info ^(.+?\.php)(/.*)$;
        set $path_info $fastcgi_path_info;

        try_files $fastcgi_script_name =404;

        include fastcgi_params;
        fastcgi_param SCRIPT_FILENAME $document_root$fastcgi_script_name;
        fastcgi_param PATH_INFO $path_info;
        fastcgi_param HTTPS on;

        fastcgi_param modHeadersAvailable true;         # Avoid sending the security headers twice
        fastcgi_param front_controller_active true;     # Enable pretty urls
        fastcgi_pass php-handler;

        fastcgi_intercept_errors on;
        fastcgi_request_buffering off;

        fastcgi_max_temp_file_size 0;
    }

    # Serve static files
    location ~ \.(?:css|js|mjs|svg|gif|png|jpg|ico|wasm|tflite|map|ogg|flac)$ {
        try_files $uri /index.php$request_uri;
        # HTTP response headers borrowed from Nextcloud `.htaccess`
        add_header Cache-Control                     "public, max-age=15778463$asset_immutable";
        add_header Referrer-Policy                   "no-referrer"       always;
        add_header X-Content-Type-Options            "nosniff"           always;
        add_header X-Frame-Options                   "SAMEORIGIN"        always;
        add_header X-Permitted-Cross-Domain-Policies "none"              always;
        add_header X-Robots-Tag                      "noindex, nofollow" always;
        add_header X-XSS-Protection                  "1; mode=block"     always;
        access_log off;     # Optional: Don't log access to assets
    }

    location ~ \.woff2?$ {
        try_files $uri /index.php$request_uri;
        expires 7d;         # Cache-Control policy borrowed from `.htaccess`
        access_log off;     # Optional: Don't log access to assets
    }

    # Rule borrowed from `.htaccess`
    location /remote {
        return 301 /remote.php$request_uri;
    }

    location / {
        try_files $uri $uri/ /index.php$request_uri;
    }
}
-
Symlink configuration site available to site enabled.
$ ln -s /etc/nginx/sites-available/nextcloud.conf /etc/nginx/sites-enabled/ -
Restart NGinx and access the URI in the browser.
-
Go through the installation of Nextcloud.
-
The user data on the installation dialog should point e.g to
administratoror similar, that user will become administrative access rights in Nextcloud! -
To adjust the database connection detail you have to edit the file
$install_folder/config/config.php. Means here in the example within this post you would need to modify/var/www/html/nextcloud/config/config.phpto control or change the database connection.
---%<---
    'dbname' => 'nextcloud_db',
    'dbhost' => 'localhost', #(Or your remote PostgreSQL server address if you have.)
    'dbport' => '',
    'dbtableprefix' => 'oc_',
    'dbuser' => 'nextcloud_user',
    'dbpassword' => '1234', #(The password you set for database user.)
--->%---
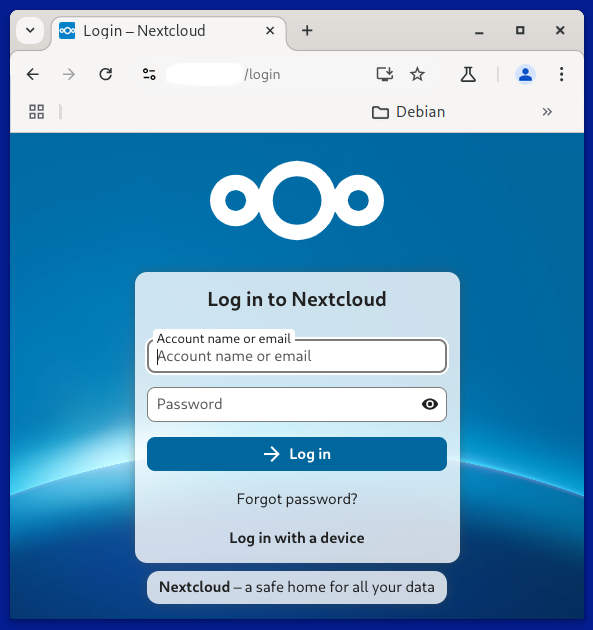
After the installation and setup of the Nextcloud PHP application there are more steps to be done. Have a look into the WebUI what you will need to do as additional steps like create a cronjob or tuning of some more PHP configurations.
If you’ve done all things correct you should see a login page similar to this:
Optional other steps for more enhanced configuration modifications
Move the data folder to somewhere else
The data folder is the root folder for all user content. By default it is
located in $install_folder/data, so in our case here it is in
/var/www/html/nextcloud/data.
-
Move the data directory outside the web server document root.
$ sudo mv /var/www/html/nextcloud/data /var/nextcloud_data -
Ensure access permissions, mostly not needed if you move the folder.
$ sudo chown -R www-data:www-data /var/nextcloud_data$ sudo chown -R www-data:www-data /var/www/html/nextcloud/ -
Update the Nextcloud configuration:
-
Open the config/config.php file of your Nextcloud installation.
$ sudo vi /var/www/html/nextcloud/config/config.php -
Update the ‘datadirectory’ parameter to point to the new location of your data directory.
-
  ---%<---
     'datadirectory' => '/var/nextcloud_data'
  --->%---
-
Restart NGinx service:
$ sudo systemctl restart nginx
Make the installation available for multiple FQDNs on the same server
-
Adjust the Nextcloud configuration to listen and accept requests for different domain names. Configure and adjust the key
trusted_domainsaccordingly.$ sudo vi /var/www/html/nextcloud/config/config.php
  ---%<---
    'trusted_domains' =>
    array (
      0 => 'domain.your-domain.com',
      1 => 'domain.other-domain.com',
    ),
  --->%---
- Create and adjust the needed site configurations for the webserver.
- Restart the NGinx unit.
An error message about .ocdata might occur
-
.ocdatais not found inside the data directory-
Create file using touch and set necessary permissions.
$ sudo touch /var/nextcloud_data/.ocdata$ sudo chown -R www-data:www-data /var/nextcloud_data/
-
The password for the administrator user is unknown
-
Log in to your server:
- SSH into the server where your PostgreSQL database is hosted.
-
Switch to the PostgreSQL user:
$ sudo -i -u postgres
-
Access the PostgreSQL command line
psql
-
List the databases: (If you’re unsure which database is being used by Nextcloud, you can list all the databases by the list command.)
\l
-
Switch to the Nextcloud database:
- Switch to the specific database that Nextcloud is using.
\c nextclouddb
-
Reset the password for the Nextcloud database user:
ALTER USER nextcloud_user WITH PASSWORD 'new_password';
-
Exit the PostgreSQL command line:
\q
-
Verify Database Configuration:
-
Check the database connection details in the config.php file to ensure they are correct.
sudo vi /var/www/html/nextcloud/config/config.php -
Replace nextcloud_db, nextcloud_user, and your_password with your actual database name, user, and password.
-
---%<---
    'dbname' => 'nextcloud_db',
    'dbhost' => 'localhost', #(or your PostgreSQL server address)
    'dbport' => '',
    'dbtableprefix' => 'oc_',
    'dbuser' => 'nextcloud_user',
    'dbpassword' => '1234', #(The password you set for nextcloud_user.)
--->%---
- Restart NGinx and access the UI through the browser.